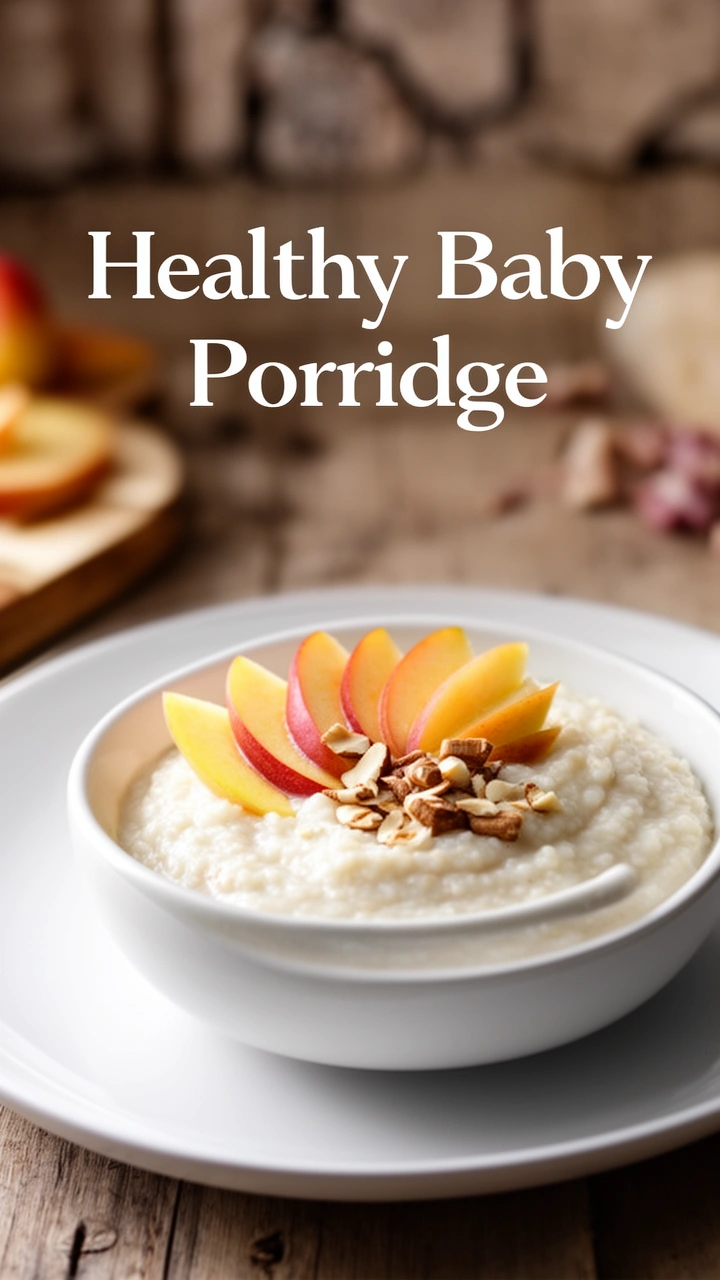
Healthy Baby Porridge

Starting solids is equal parts exciting and overwhelming. You want something nutritious, easy to make, and soft enough for a tiny mouth , but you also don’t want to spend your entire evening in the kitchen. This homemade baby porridge recipe checks every single box, and it takes less effort than you’d think.
Why Homemade Baby Porridge Beats Store-Bought Every Time
Walk down the baby food aisle and you’ll find rows of pouches and jars, all promising to be nutritious and convenient. And sure, they have their place. But homemade baby porridge gives you complete control over what goes into your baby’s bowl , no hidden sodium, no preservatives, no fillers.
This recipe uses lean ground beef, grated carrot, and rice as its foundation. That means you’re giving your baby iron from the beef, beta-carotene from the carrot, and slow-release carbohydrates from the rice , all in one meal. That’s a genuinely balanced plate for a developing little human.
What You’ll Need
Here’s the full ingredient list for this baby rice porridge:
- ½ cup rice , white rice works best for a smooth, easily digestible texture
- 1 grated carrot , adds natural sweetness and vitamins
- ¼ of a 1lb pack of lean ground beef (roughly 115g) , a great iron-rich protein source
- 1 tablespoon chicken bouillon , for a mild, flavourful broth base
- Water , you’ll need 5x the amount of your rice (so 2.5 cups for ½ cup of rice)
A quick note on the bouillon: go easy on it if your baby is still very young. Sodium content matters for little ones, especially under 12 months. Use half a tablespoon or less for younger babies, and always taste before serving.
How to Make Baby Porridge: Step-by-Step
Step 1: Wash the Rice
Start by washing your ½ cup of rice thoroughly , rinse it two or three times until the water runs mostly clear. This removes excess surface starch and helps you get a cleaner, less gummy porridge. It’s a small step that genuinely improves the final texture.
Step 2: Add Water and Bring to a Boil
Add 5 times the amount of water to your rice , so for ½ cup of rice, that’s 2.5 cups of water. Place the pot on the stovetop over medium-high heat and bring it to a boil. That high water ratio is what transforms the rice into a soft, porridge-like consistency rather than regular cooked rice.
Step 3: Prepare the Carrot While You Wait
While the water heats up, grate one full carrot finely. You want the pieces small enough to cook through completely and blend into the porridge without creating chunks that could be a texture issue for younger babies. A fine box grater works perfectly here.
Step 4: Blanch the Ground Beef in Hot Water
Here’s the technique that makes this recipe stand out. Once the water reaches a boil, scoop out some of the hot water (leaving the rice in the pot) and pour it directly over the raw ground beef in a separate bowl. Then use a fork to break the meat up thoroughly into very fine pieces.
This step partially cooks the beef and , crucially , breaks it down into a smooth, fine texture that integrates seamlessly into the porridge. It’s a clever little trick that saves you from getting chunks of meat in what should be a soft, uniform bowl.
Step 5: Add the Meat Back to the Pot
Pour the smooth beef mixture back into the pot of rice. Stir to combine everything, then add in your grated carrot. At this point you should have rice, beef, and carrot all cooking together in the same pot.
Step 6: Cook Low and Slow for 20 Minutes
Reduce the stove to low heat to prevent boiling over, and let everything cook for an additional 20 minutes. Stir occasionally , every few minutes is enough , to stop the porridge from sticking to the bottom of the pot.
You’ll notice the mixture thickening gradually as the rice breaks down and absorbs the liquid. That’s exactly what you want. The longer it cooks on low, the creamier and more cohesive the texture becomes.
Step 7: Add the Chicken Bouillon
Once the porridge reaches your desired consistency, stir in about 1 tablespoon of chicken bouillon. Taste it before serving and adjust. For younger babies under 12 months, use significantly less , just enough to add a mild savoury note without loading up on sodium.
If the porridge feels too thick, add a splash of warm water and stir until you reach the right consistency for your baby’s stage.
Adjusting This Recipe for Different Ages and Stages
6–8 Months: Keep It Smooth
At this age, babies need a thinner, very smooth consistency. Add extra water to loosen the porridge, and consider blending it briefly with a hand blender to get rid of any texture that might challenge a newer eater. Use very minimal bouillon , just a hint of flavour.
8–10 Months: Slightly More Texture
Babies at this stage can handle a bit more texture as they develop their chewing and swallowing coordination. You can leave the porridge at its natural consistency without blending. The grated carrot will be soft enough to manage without extra processing.
10–12 Months and Beyond
At this point, your baby can handle chunkier, more textured food. You can increase the carrot pieces slightly, add additional vegetables, or even introduce small pieces of soft-cooked broccoli. The porridge itself can be thicker, closer to a congee consistency.
Vegetable Swaps and Additions That Work Beautifully
One of the best things about this baby porridge recipe is how adaptable it is. The rice and beef base stays constant, but you can rotate the vegetables based on what you have, what’s in season, and what your baby enjoys. FYI, here are some great options:
- Broccoli , rich in vitamin C and folate; chop very finely or blend in
- Sweet potato , naturally sweet, smooth texture, and packed with vitamins
- Peas , blend them in for a vibrant colour and added protein
- Spinach , a small handful adds iron without changing the flavour much
- Pumpkin , mild, sweet, and easy to cook down into the porridge
The creator of this recipe mentions loving carrots and broccoli together , and honestly, that combination is a winner. The sweetness of carrot balances the earthiness of broccoli, and both cook down beautifully in the porridge.
Tips for Making Baby Porridge Successfully Every Time
A few things worth keeping in mind:
- Always taste before serving. Your baby’s food should taste good to you , bland doesn’t mean safe, it just means less nutritious and less appetising.
- Watch the sodium. Chicken bouillon can be salty. For babies under 12 months, the NHS and most paediatric guidelines recommend keeping sodium intake very low. Use bouillon sparingly and opt for low-sodium versions where possible.
- Stir regularly during cooking. Rice porridge sticks to the bottom of the pot easily. A stir every 3–4 minutes keeps everything moving and prevents burning.
- Consistency is adjustable. Too thick? Add warm water. Too thin? Cook for a few more minutes uncovered. There’s no wrong answer here , match it to your baby’s current stage.
- Batch cook and freeze. This recipe scales up easily. Make a larger batch, portion it into ice cube trays, freeze, and then transfer to a freezer bag. You’ll have individual portions ready to reheat all week.
Homemade Baby Porridge vs. Commercial Baby Food: A Real Comparison
| Feature | Homemade Baby Porridge | Store-Bought Baby Food |
|---|---|---|
| Ingredient control | Complete | Limited |
| Sodium levels | Fully adjustable | Often higher |
| Cost | Very low | Higher per serving |
| Nutrition | Whole food ingredients | Variable quality |
| Customisation | Unlimited | Fixed recipes |
| Prep time | ~30 minutes | Zero |
Store-bought baby food wins on convenience , that’s a fair point. But homemade baby porridge wins on everything else. When you make it yourself, you know exactly what your baby eats, and you can adjust it as their needs and tastes develop.
Storing and Reheating Baby Porridge Safely
Refrigerator: Store cooled porridge in an airtight container for up to 2 days. Always reheat thoroughly and allow it to cool to a safe temperature before serving.
Freezer: Portion into ice cube trays and freeze for up to one month. Defrost overnight in the fridge or reheat from frozen in a small saucepan with a splash of water.
Reheating: Always stir during reheating and test the temperature on your wrist before giving it to your baby. Never serve straight from the microwave without stirring , hot spots form and can burn tiny mouths.
Final Thoughts: This Baby Porridge Recipe Is a Keeper
Simple ingredients, real nutrition, and a flexible recipe you can adapt as your baby grows , this homemade baby porridge genuinely delivers. The beef adds iron that’s critical for development. The carrot adds vitamins and natural sweetness. The rice creates that soft, easily digestible base that works for babies at every stage of weaning.
Make a big batch, freeze the extras, and you’ve got a week’s worth of wholesome meals sorted. Your baby gets real food. You get your evening back. That feels like a win for everyone involved. 🙂
Now go wash that rice , your little one’s best bowl yet is only 30 minutes away.
3
servings15
minutes25
minutes190
kcalIngredients
1/2 cup rice, rinsed
1 grated carrot
1/4 of a 1 lb pack lean ground beef (about 115 g)
1 tablespoon chicken bouillon
2.5 cups water
Directions
- Rinse the rice thoroughly 2 to 3 times until the water runs mostly clear.
- Add the rice and 2.5 cups water to a pot and bring to a boil over medium-high heat.
- While the water heats, finely grate the carrot.
- Once boiling, scoop out some of the hot water and pour it over the ground beef in a separate bowl, then use a fork to break it into very fine pieces.
- Return the beef mixture to the pot with the rice and stir to combine, then add the grated carrot.
- Reduce heat to low and cook for about 20 minutes, stirring occasionally so it doesn’t stick.
- Stir in the bouillon near the end, taste, and cook a little longer if needed until the porridge is soft and cohesive.
Notes
- For younger babies, use less bouillon or skip it entirely to reduce sodium; leftovers can be refrigerated for up to 3 days and reheated with a splash of water.