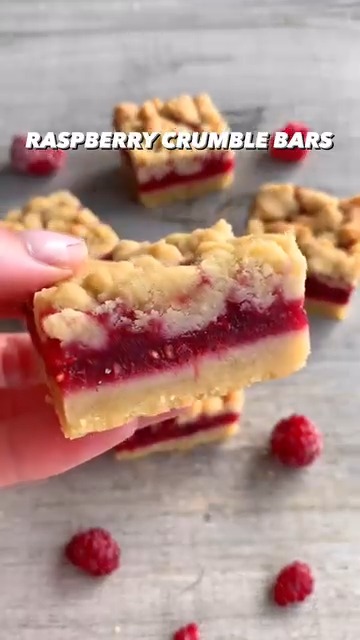
Raspberry Crumble Bars
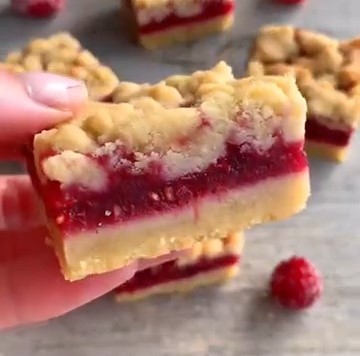
Some recipes just stick. Not literally — well, actually, a little literally — but you know what I mean. The kind of bake you make once, share with friends, and suddenly everyone wants the recipe. These raspberry crumble bars are exactly that. Buttery shortbread on the bottom, a tangy-sweet raspberry filling in the middle, and a golden crumble on top. Three layers, one pan, zero complaints.
What Makes These Raspberry Crumble Bars So Good?
Let’s be real — the internet has no shortage of crumble bar recipes. So what makes this one worth your time?
It comes down to three things:
- A proper shortbread base — not a soggy, underwhelming biscuit layer, but a real buttery shortbread that holds its shape when you cut it
- A double-raspberry filling — frozen raspberries and raspberry jam together, which gives you both texture and deep, concentrated flavour
- A crumble that actually crumbles — golden, slightly crisp on top, soft underneath where it meets the filling
IMO, the combination of fresh-frozen raspberries with jam is the move that separates a good crumble bar from a great one. The jam binds everything together while the raspberries keep things tart and real.
The Ingredients You’ll Need
This recipe uses one dough for both the base and the crumble topping — which means less faff and fewer bowls to wash. Always a win.
For the Shortbread Base and Crumble Topping
- 225g salted butter, softened
- 120g granulated sugar
- 320g plain flour
For the Raspberry Filling
- 230g frozen raspberries
- 150g raspberry jam
- 60g granulated sugar
- 3 tbsp cornflour
- ½ tbsp lemon juice
You’ll also need: an 8×8 inch baking tin, lined with parchment paper.
A quick note on the butter — use salted. I know some recipes insist on unsalted, but the pinch of salt already in salted butter genuinely enhances the shortbread flavour here. It balances the sweetness without you having to think about it.
Equipment and Prep: Get This Right First
Before you touch a single ingredient, sort your tin and your oven. It sounds obvious, but rushing the prep is how things go sideways.
Here’s what you need to set up:
- Line your 8×8 inch tin with baking parchment, leaving some overhang on the sides so you can lift the bars out cleanly later
- Preheat your oven to 190°C (170°C fan)
- Take your butter out of the fridge at least 30 minutes ahead so it’s properly softened — cold butter will not mix evenly and your shortbread will suffer for it
That overhang tip is something I learned the hard way. Trying to remove crumble bars from an unlined tin is a special kind of frustration :/ — you end up with crumbled crumble bars, which, while still delicious, isn’t quite the aesthetic.
How to Make Raspberry Crumble Bars: Step-by-Step
Step 1: Make the Shortbread Dough
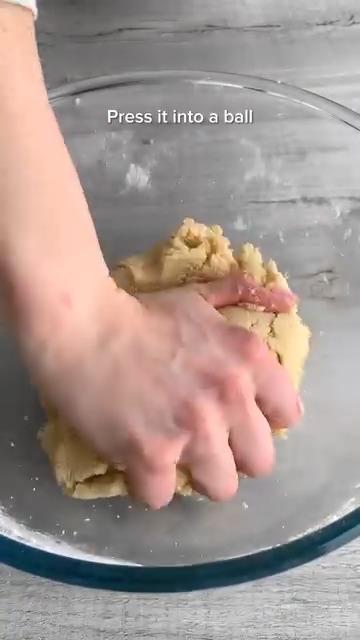
Beat together the 225g softened salted butter and 120g granulated sugar until the mixture turns pale and slightly fluffy. Add the 320g plain flour and mix until a crumbly dough comes together — it should hold when you press it between your fingers but still feel a bit sandy.
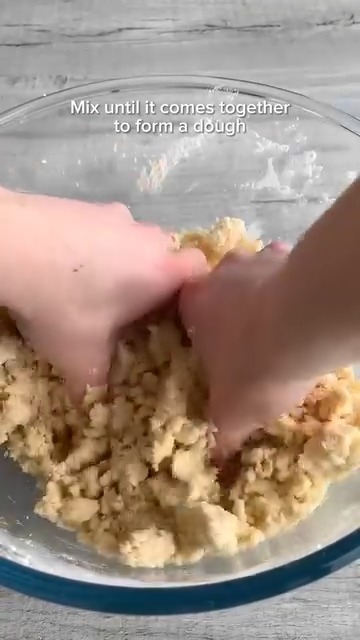
Don’t overwork the dough. Mix just until it comes together. Overworking develops gluten, and you want a tender, crumbly shortbread — not a tough one.
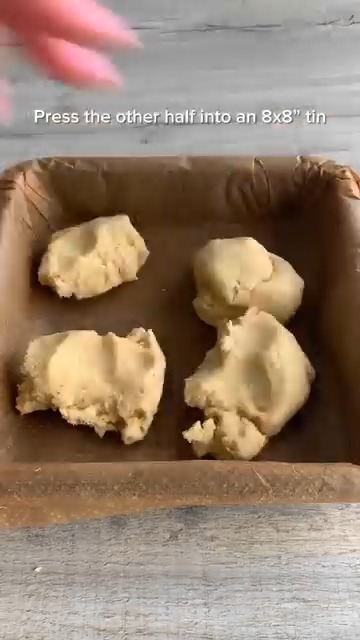
Step 2: Press the Base and Pre-Bake
Take roughly two-thirds of the dough and press it evenly into your lined 8×8 tin. Use the back of a spoon or the bottom of a glass to smooth it out flat. Bake at 190°C (170°C fan) for 15 minutes, until the base looks just set and lightly golden at the edges.

Remove it from the oven and let it cool for around 15 minutes before adding the filling. This step matters — if you pour the filling onto a hot base, it starts cooking unevenly and you lose that clean layer separation.
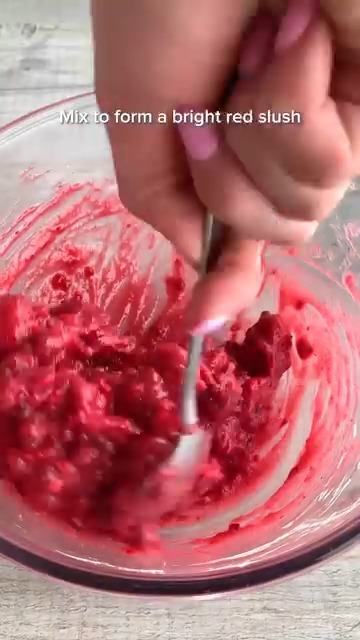
Step 3: Make the Raspberry Filling
While the base cools, mix together:
- 230g frozen raspberries (no need to thaw them)
- 150g raspberry jam
- 60g granulated sugar
- 3 tbsp cornflour
- ½ tbsp lemon juice

Stir everything together until well combined. The cornflour is doing important work here — it thickens the filling as it bakes so you get a jammy, set layer rather than a watery, runny one. The lemon juice cuts through the sweetness and makes the raspberry flavour pop.
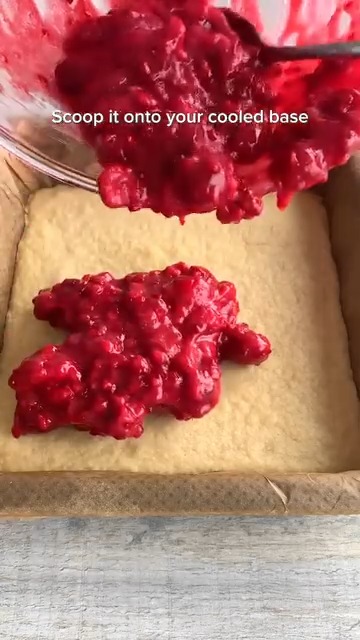
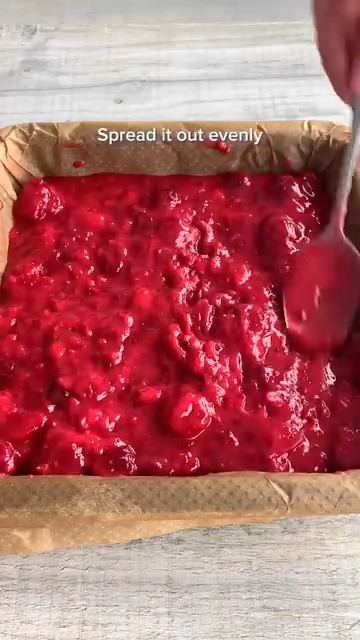
Step 4: Assemble and Add the Crumble
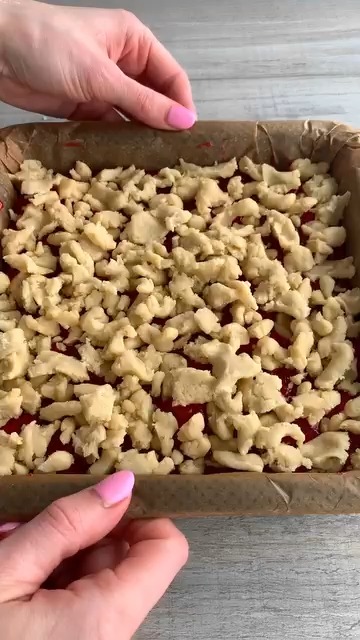
Once the base has cooled for 15 minutes, spread the raspberry filling evenly over the top. Then take the remaining one-third of shortbread dough and crumble it over the filling with your fingers, breaking it into rough, irregular chunks. You want variety in the size — some bigger crumbles, some finer bits — so the topping has texture.
Step 5: Bake Until Golden
Return the tin to the oven and bake for 35 minutes at 190°C (170°C fan). The topping should turn a deep golden colour, and you’ll see the raspberry filling bubbling up around the edges — that’s exactly what you want to see.
Let the bars cool completely in the tin before cutting. I know it’s hard. I know. But cutting them warm means they fall apart, and you deserve clean, sharp edges on your crumble bars.
Why Frozen Raspberries Work Better Than Fresh Here
This comes up every time I share this recipe, so let me clear it up. Fresh raspberries are wonderful in plenty of things — on top of pavlova, stirred into yogurt, eaten straight from the punnet. But in a baked filling? Frozen raspberries consistently outperform fresh.
Here’s why:
- Frozen raspberries hold more moisture, which releases during baking and creates a juicier, more flavourful filling
- They’re available year-round and usually cheaper than fresh
- The texture softens perfectly in the oven — no mushy pre-cook required
- Combined with jam, they create a layered raspberry depth that fresh berries alone can’t quite match
Fresh raspberries tend to break down too quickly and can make the filling watery if you’re not careful. Frozen gives you more control, and the result is consistently better.
Tips for Perfect Crumble Bars Every Time
A few things I’ve picked up from making these regularly:
Getting the Base Right
- Press the dough firmly and evenly into the tin — uneven thickness means uneven baking
- Don’t skip the pre-bake — the base needs those 15 minutes to set before it takes on the weight of the filling
- Cool it properly before adding the filling — 15 minutes minimum, no shortcuts
Nailing the Crumble Topping
- Break the dough into irregular pieces — uniform crumbles look stiff; rough, varied pieces look rustic and bake better
- Don’t press the crumble down onto the filling — let it sit loosely so it crisps up properly in the oven
- Watch the colour — you want deep golden, not pale. Pale crumble = underdone and slightly doughy
Cutting and Storing
- Cool completely before cutting — this is non-negotiable for clean bars
- Use a sharp knife and wipe it clean between cuts for the neatest edges
- Store in an airtight container at room temperature for up to 3 days, or refrigerate for up to 5 days
Variations Worth Trying
Once you’ve made the base recipe and it’s become your go-to (and it will), here are a few ways to switch things up:
- Mixed berry version: Swap the frozen raspberries for a mix of frozen raspberries, blackberries, and blueberries
- Lemon raspberry: Add a teaspoon of lemon zest to the shortbread dough for a citrusy edge
- Almond crumble: Mix 50g ground almonds into the crumble topping dough for a nuttier, slightly richer texture
- White chocolate drizzle: Once the bars cool, drizzle melted white chocolate over the top — sounds extra, tastes incredible
FYI, the almond crumble version is something I stumbled onto by accident when I had leftover ground almonds to use up, and it’s genuinely become my favourite variation. The almond flavour pairs beautifully with raspberry.
Raspberry Crumble Bars vs. Other Bar Recipes: An Honest Take
You’ve got options when it comes to fruit bars — lemon bars, blondies with fruit, jam thumbprint cookies scaled up. So where do raspberry crumble bars sit?
| Raspberry Crumble Bars | Lemon Bars | Fruit Crumble | |
|---|---|---|---|
| Effort level | Medium | Medium-high | Low |
| Portability | Excellent | Moderate | Poor |
| Shelf life | 3–5 days | 3 days | 2 days |
| Crowd appeal | Very high | High | High |
| Requires chilling | No | Yes | No |
The portability factor is honestly underrated. These bars travel well, hold their shape, and work just as well at a picnic as they do on a dessert plate. Crumble straight from a dish is delicious, but it’s a bit of a nightmare to transport. These bars solve that problem entirely..
Final Thoughts: Make These This Weekend
Raspberry crumble bars hit every note you want from a bake — they’re straightforward enough for a relaxed weekend afternoon, impressive enough to bring to any gathering, and genuinely delicious in a way that keeps people coming back for seconds.
The buttery shortbread base, the tangy raspberry filling, and the golden crumble on top — it’s a combination that just works, every single time. No complicated techniques, no specialist equipment, no stress.
9
servings20
minutes40
minutes360
kcalIngredients
225g salted butter, softened
120g granulated sugar
320g plain flour
230g frozen raspberries
150g raspberry jam
60g granulated sugar
3 tbsp cornflour
1/2 tbsp lemon juice
Directions
- Preheat the oven to 190°C (170°C fan) and line an 8×8 inch baking tin with parchment paper, leaving an overhang for lifting the bars out later.
- Beat the softened salted butter and granulated sugar together until pale and slightly fluffy.
- Add the plain flour and mix until a crumbly dough forms that holds together when pressed.
- Press about two-thirds of the dough evenly into the prepared tin to form the base.
- Bake the base for 15 minutes, until just set and lightly golden at the edges.
- While the base bakes, mix the frozen raspberries, raspberry jam, granulated sugar, cornflour, and lemon juice together for the filling.
- Spread the raspberry filling over the pre-baked base.
- Crumble the remaining dough over the top to make the topping.
- Bake until the top is golden and the filling is bubbling, then cool completely before slicing into bars.
Notes
- Cool completely before cutting for neat slices; the bars keep well in an airtight container for several days or can be frozen.