Oat Protein Balls: The 5-Ingredient Snack
You know that moment when you’re hungry between meals, you open the fridge, and there’s genuinely nothing worth eating? These oat protein balls exist to fix that exact problem. Five core ingredients, zero baking, and about 15 minutes of actual effort. I started making these on Sunday afternoons and stopped buying protein bars almost entirely — the difference in taste and cost is embarrassing.
If you want a high-protein, no-bake snack that actually satisfies you, this is the recipe.
Why Oat Protein Balls Are Worth Your Time
Protein bars from the shop often contain a list of ingredients you need a science degree to understand. Oat protein balls give you full control — you choose the protein powder, you choose the sweetener, you know exactly what you’re eating.
They’re also genuinely filling. Rolled oats provide slow-release carbohydrates that sustain your energy rather than spiking and crashing it. Pair that with protein powder and peanut butter, and you’ve got a snack that works before training, after training, or as an afternoon pick-me-up.
The Ingredients: What Goes In and Why
This recipe keeps things simple by design. Every ingredient serves a clear purpose. Here’s what you need:
- ½ cup (50g) protein powder — your primary protein source
- ½ cup (50g) rolled oats — structure, fibre, and slow-release energy
- ⅓ cup (80g) peanut butter — healthy fats, binding agent, flavour
- 3 to 5 tbsp maple syrup (or honey, to taste) — natural sweetness and moisture
- A pinch of salt — balances and sharpens all the flavours
- ¼ cup (40g) chocolate chips — optional, but honestly why would you skip them
How to Make Oat Protein Balls
The method is genuinely as simple as it sounds. Here’s the full process:
Step 1: Mix Everything Together
Add all your ingredients to a large mixing bowl:
- 50g rolled oats
- 50g protein powder
- 80g peanut butter
- 3 tbsp maple syrup or honey (add more as needed)
- A pinch of salt
- 40g chocolate chips (if using)

Stir everything together until a thick, uniform dough forms. The mixture should feel sticky but holdable — if you press a small amount between your fingers, it should stick together without crumbling. If it crumbles, add another tablespoon of maple syrup. If it feels too wet to roll, add a small handful of extra oats.

Step 2: Roll Into Balls
Scoop out portions of the mixture and roll them between your palms into smooth balls. Aim for roughly tablespoon-sized portions — this typically gives you around 10–14 balls depending on size. Slightly damp hands make rolling much easier and stop the mixture sticking to your skin.

Step 3: Refrigerate for 2–3 Hours
Place the rolled balls on a plate or tray lined with baking paper. Refrigerate for at least 2–3 hours before eating. This step is non-negotiable — the chill time firms them up significantly and improves both texture and flavour. FYI, leaving them overnight makes them even better.

Choosing the Right Protein Powder
Your choice of protein powder affects both the flavour and texture of these oat protein balls more than any other ingredient. Here’s a quick breakdown:
| Protein Type | Texture | Flavour Impact | Best For |
|---|---|---|---|
| Vanilla whey | Smooth, soft | Mild, sweet | Most versatile option |
| Chocolate whey | Slightly denser | Rich, indulgent | Pairs well with choc chips |
| Unflavoured whey | Neutral | Lets other flavours shine | Total control over taste |
| Plant-based protein | Drier, denser | Earthier | Vegan-friendly option |
Vanilla whey works best for a first attempt because it complements the peanut butter and maple syrup without competing. Chocolate protein with chocolate chips is also a legitimate choice if you want a fully chocolate-forward snack.
A Note on Plant-Based Protein Powder
Plant-based protein absorbs significantly more liquid than whey. If you use it, start with 4 tablespoons of maple syrup instead of 3, and check your mixture consistency before adding more oats. The balls will be slightly denser but still taste great
Texture, Taste, and What to Expect
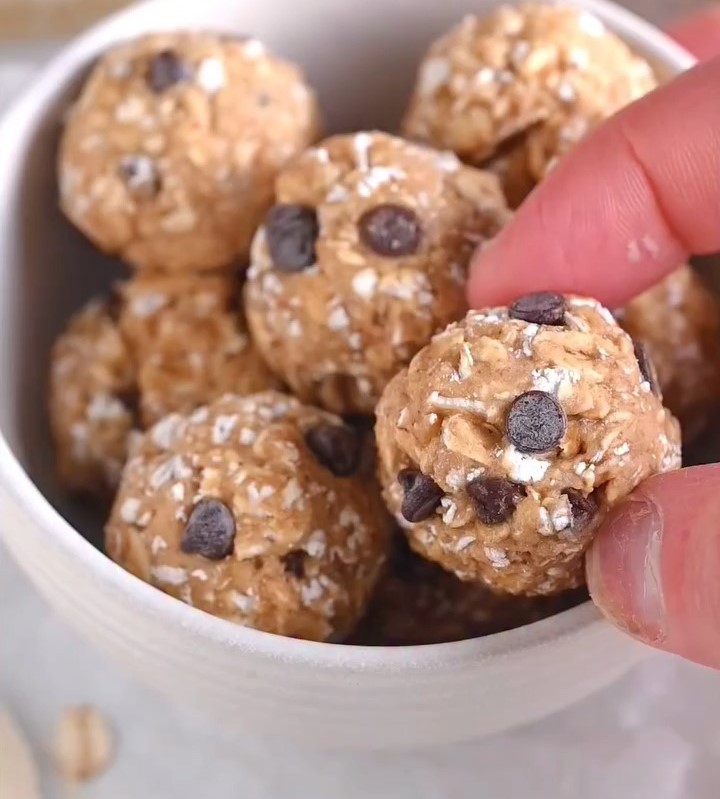
Oat protein balls have a satisfying, chewy texture with a slight density from the oats and protein powder. They’re not soft like a chickpea-based ball or rich and creamy like a Biscoff ball — they sit firmly in “energy ball” territory, which is exactly the point.
The flavour centres around peanut butter and subtle sweetness, with the maple syrup or honey adding warmth rather than a sharp sugary hit. Add chocolate chips and you get little pockets of richness throughout that turn a functional snack into something genuinely enjoyable.
Fresh vs. Chilled
The difference between eating one straight from rolling versus after 2–3 hours in the fridge is notable. Fresh out of mixing, they’re softer and a bit sticky. After chilling, they firm up into proper dense, cohesive snack balls that hold their shape when you pick them up. Always chill before serving.
Customisation Options That Actually Work
The base recipe is a canvas. Once you’ve nailed the original version, here are some variations worth trying:
- Add 1 tbsp cocoa powder for a chocolate-peanut butter combo
- Mix in 2 tbsp chia seeds for extra fibre and omega-3s
- Add cinnamon and nutmeg for a warm, spiced version
- Swap peanut butter for tahini for a slightly more savoury profile
- Roll them in desiccated coconut or crushed oats for a textured coating
- Use white chocolate chips instead of dark for a sweeter result
- Add a tablespoon of flaxseed to boost the nutritional profile further
IMO, the peanut butter + vanilla whey + chocolate chips version is the best starting point. Get comfortable with that before experimenting.
Nutrition at a Glance
Per ball (based on 12 balls from the full recipe, chocolate chips included):
- Protein: ~6–8g per ball
- Carbohydrates: ~10–12g (mostly from oats and sweetener)
- Fat: ~5–6g (from peanut butter)
- Fibre: Meaningful — oats contribute both soluble and insoluble fibre
- Calories: Approximately 110–130 per ball
Two balls post-workout delivers a solid 12–16g of protein alongside the carbohydrates your muscles need for recovery. They also work as a pre-workout snack about an hour before training — the slow-release oats keep your energy steady throughout.
Storage and Meal Prep Guide
Oat protein balls are built for meal prep. Make a double batch and you’re sorted for two weeks of snacks with one 30-minute session.
- Fridge: Store in an airtight container for up to 1 week
- Freezer: Freeze in a single layer first, then transfer to a freezer bag — good for up to 3 months
- Thawing: Transfer to the fridge the night before, or leave at room temperature for 20 minutes
Frozen oat protein balls thaw quickly and taste essentially the same as fresh ones. Batch freezing is genuinely one of the most efficient things you can do for your weekly nutrition.
How They Stack Up Against Store-Bought Protein Snacks
Let’s be honest about what you get from a shop-bought protein bar versus a homemade oat protein ball:
| Factor | Homemade Oat Balls | Store-Bought Protein Bar |
|---|---|---|
| Ingredients | 5–6 whole foods | Often 15–25 ingredients |
| Cost per serving | ~$0.30–0.50 | ~$3–5 |
| Sugar alcohols | None | Often present |
| Customisable | Fully | Not at all |
| Taste | Genuinely good | Variable, often chalky |
| Prep time | 15 min + chill | Zero |
The only real advantage of store-bought is convenience. And once you have a batch of these in your fridge, that advantage disappears.
Final Thoughts
Oat protein balls are one of the most practical things you can add to your weekly routine. They’re fast to make, cheap per serving, nutritionally solid, and — most importantly — they actually taste good. The combination of rolled oats, peanut butter, protein powder, and maple syrup produces a snack that feels indulgent without the consequences of an actual treat.
Make your first batch this weekend, leave them in the fridge overnight, and taste the difference a proper snack prep makes. Once you start, you’ll wonder why you ever paid $4 for a chalky bar that disappointed you every single time.