How to Make Protein Balls: Quick & Easy Guide
Let’s be real , finding a snack that’s actually good for you and tastes amazing feels like winning the lottery. Protein balls check both boxes, and once you make your first batch, you’ll wonder how you survived without them. I’ve been making these little guys for years, and they’ve genuinely changed how I snack. Ready to make some? Let’s get into it.
What Are Protein Balls, Anyway?
Protein balls (also called energy balls or bliss balls) are no-bake, bite-sized snacks packed with protein, healthy fats, and natural sweetness. Think of them as a homemade protein bar , but rounder, softer, and honestly way more satisfying.
They’re incredibly versatile. You can customize them based on your dietary needs, flavor preferences, or whatever you happen to have in your pantry. IMO, that flexibility is what makes them so addictive to make.
Why You Should Be Making Protein Balls
Before we jump to the recipe, here’s why protein balls deserve a permanent spot in your weekly meal prep:
- High in protein , great for post-workout recovery or afternoon energy slumps
- No baking required , seriously, zero oven time
- Meal prep friendly , make a big batch on Sunday, snack all week
- Kid-approved , my nieces demolish these in seconds
- Customizable , swap ingredients based on allergies or preferences
They’re also genuinely portable. Toss a few in a small container and you’ve got a snack that travels better than most protein bars, without the weird ingredient list.
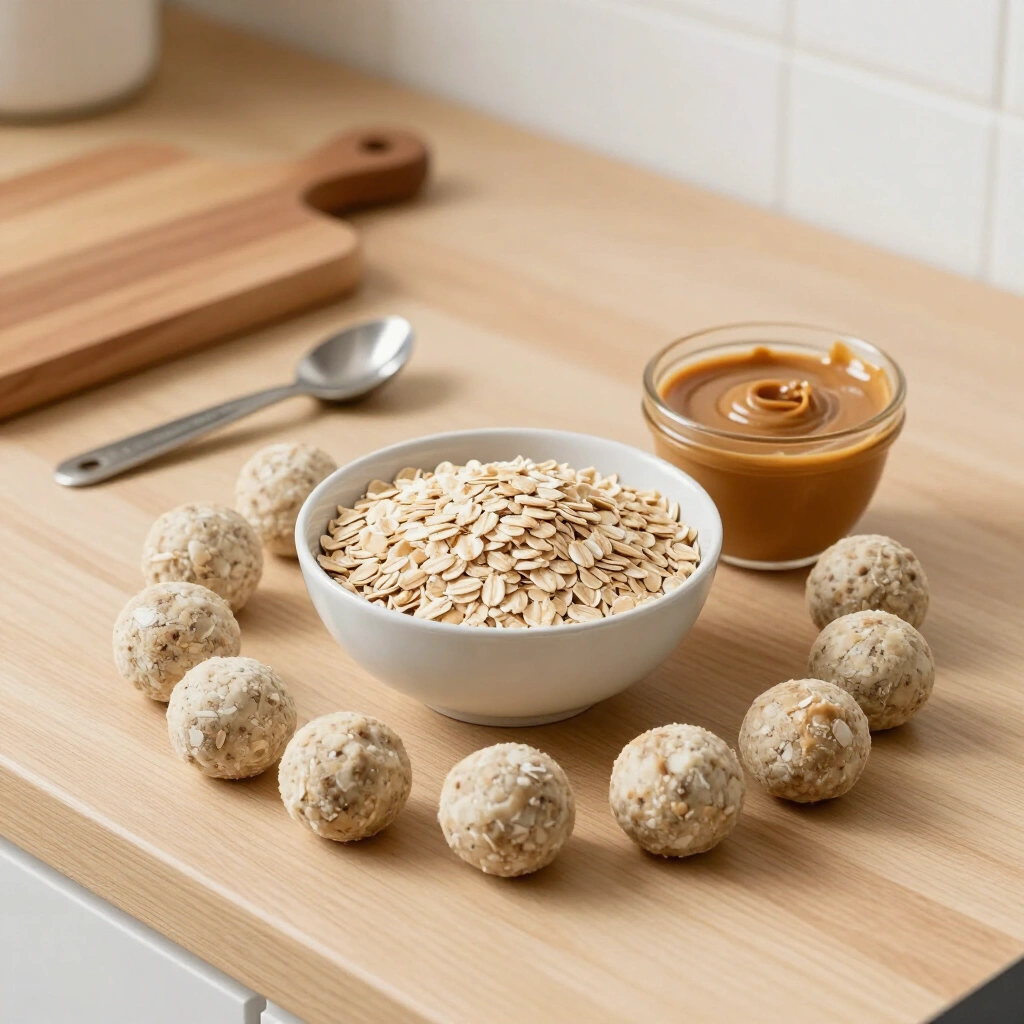
The Core Ingredients You’ll Need
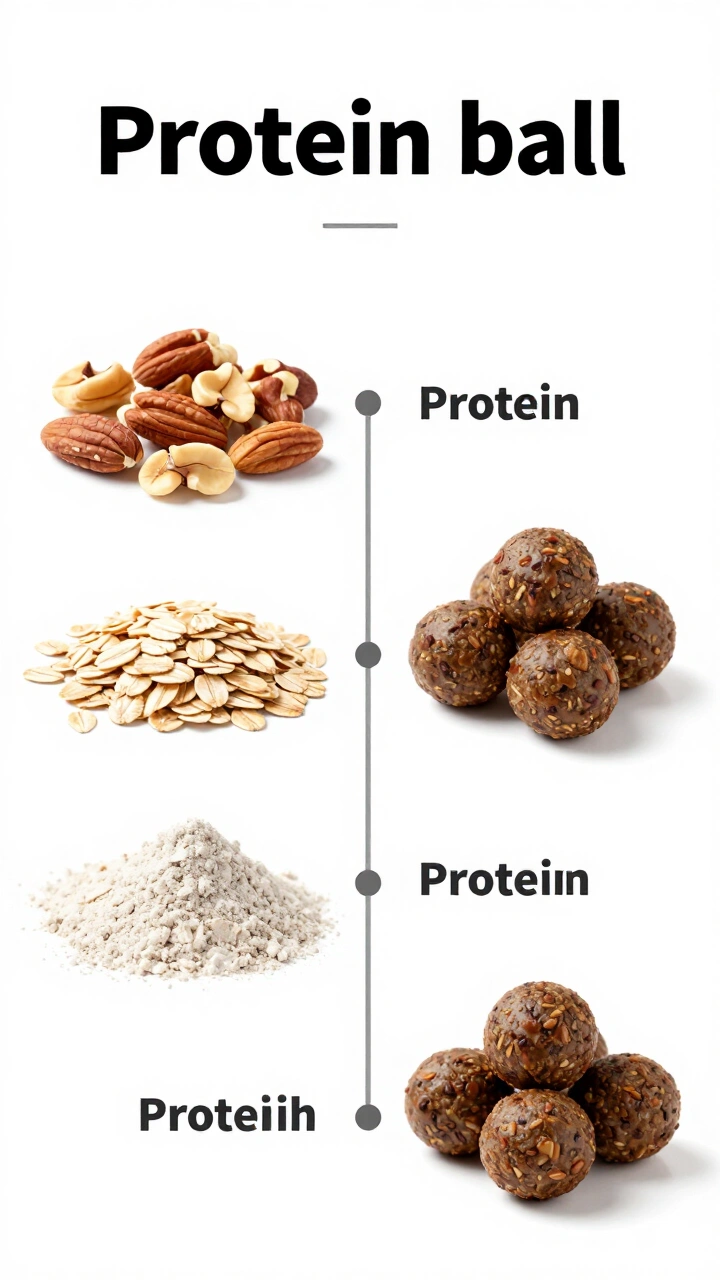
Here’s the beautiful thing about protein balls , you don’t need anything fancy. Most of these ingredients are probably already sitting in your kitchen.
The Base
Your base is what holds everything together and gives the balls their texture:
- Rolled oats , adds fiber, texture, and that satisfying chew
- Nut butter (peanut, almond, or cashew) , the binding agent and fat source
- Honey or maple syrup , natural sweetness that also helps bind
The Protein Boost
This is where the “protein” in protein balls actually comes from:
- Protein powder , vanilla or chocolate both work brilliantly
- Greek yogurt , adds creaminess and a sneaky protein punch
- Hemp seeds or chia seeds , plant-based protein plus omega-3s
The Fun Add-Ins
This is where you make them yours:
- Mini chocolate chips , because chocolate makes everything better
- Shredded coconut , adds texture and a subtle sweetness
- Dried fruit (cranberries, raisins) , chewy little flavor bursts
- Flaxseeds , barely noticeable but seriously nutritious
- Cocoa powder , for a deeper, richer chocolate flavor
The Classic Protein Ball Recipe
Alright, here’s the base recipe I keep coming back to. It’s simple, reliable, and genuinely delicious. Makes about 20–25 balls.
Ingredients
- 1 ½ cups rolled oats
- ½ cup peanut butter (or any nut butter)
- ⅓ cup honey
- ½ cup vanilla protein powder
- ¼ cup mini chocolate chips
- 2 tablespoons chia seeds
- 1 teaspoon vanilla extract
- Pinch of salt
Step-by-Step Instructions
Step 1: Mix the wet ingredients In a large mixing bowl, combine the peanut butter, honey, and vanilla extract. Stir until smooth and well blended. This forms the sticky base that everything else clings to.
Step 2: Add the dry ingredients Add the rolled oats, protein powder, chia seeds, and salt. Mix everything together until you get a thick, slightly sticky dough. It should hold its shape when you press it together.
Step 3: Fold in the chocolate chips Gently stir in the chocolate chips last so they don’t get crushed. You want those little pockets of chocolate to stay intact , trust me on this one 🙂
Step 4: Chill the mixture Cover the bowl and refrigerate for at least 30 minutes. This step is non-negotiable. Chilling firms up the mixture and makes rolling way easier. Skip it and you’ll end up with a sticky mess on your hands , literally.
Step 5: Roll into balls Using a tablespoon or small cookie scoop, portion out the mixture and roll it between your palms into smooth, compact balls. Aim for roughly 1-inch diameter , the perfect two-bite size.
Step 6: Store and enjoy Place the finished balls on a parchment-lined tray, then transfer to an airtight container. Store in the fridge for up to one week, or freeze for up to three months.
Tips for Perfect Protein Balls Every Time
Even a simple recipe has a few tricks that separate good results from great ones. Here’s what I’ve learned from years of batch-making:
Get the Consistency Right
The mixture should feel like soft cookie dough , tacky enough to hold a shape but not so wet it sticks to everything. If it’s too dry, add a teaspoon of nut butter or honey. If it’s too sticky, add a tablespoon of oats or protein powder.
Don’t Skip the Chill Time
I know, waiting is annoying. But 30 minutes in the fridge makes a massive difference. The oats absorb moisture, the nut butter firms up, and the whole mixture becomes much easier to handle. Patience pays off here.
Use Wet Hands for Rolling
Slightly dampen your hands before rolling each ball. This prevents the mixture from sticking to your palms and gives you a smoother finish. It’s a small trick that makes the whole process much less frustrating.
Taste the Mixture Before Rolling
Always taste your mixture before you commit to rolling 20+ balls. Need more sweetness? Add honey. Want more chocolate flavor? Add cocoa powder. Adjust before rolling, not after.
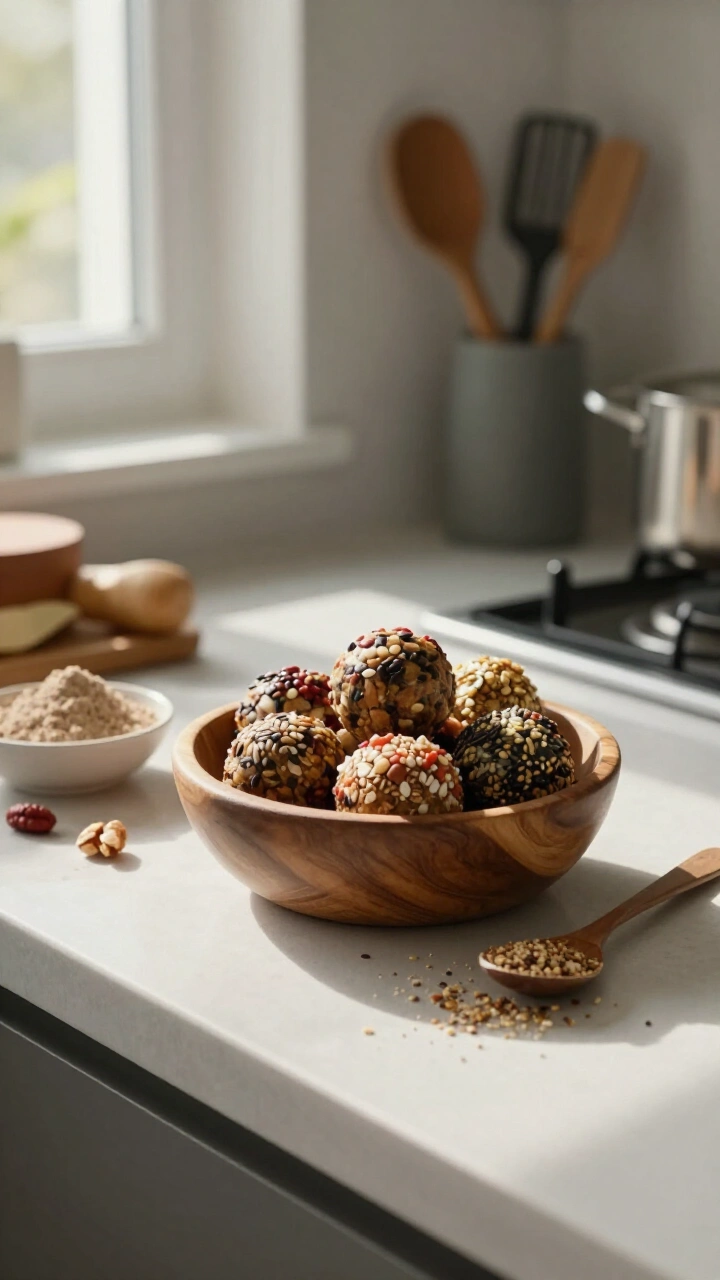
Flavor Variations Worth Trying
Once you’ve nailed the classic recipe, the real fun begins. Here are some of my favorite flavor combos:
Chocolate Peanut Butter
Replace the vanilla protein powder with chocolate protein powder and add 2 tablespoons of cocoa powder. Rich, indulgent, and suspiciously close to a Reese’s cup.
Coconut Almond Joy
Use almond butter, add ¼ cup shredded coconut, and toss in some dark chocolate chips. Tropical, sweet, and weirdly satisfying.
Matcha Energy Balls
Swap the cocoa for 1–2 teaspoons of matcha powder and use white chocolate chips. These look gorgeous and taste clean and earthy , great pre-workout fuel.
No-Nut Option (School Safe!)
Use sunflower seed butter instead of peanut butter. It works just as well and makes these nut-allergy-friendly. FYI, the flavor is slightly different but totally delicious.
Common Mistakes to Avoid
Let’s save you from the trial-and-error I went through:
- Using natural nut butter straight from the fridge , it’s too thick. Let it come to room temperature first so it blends smoothly
- Adding protein powder without adjusting liquid , protein powder absorbs moisture aggressively. If your mixture feels too dry, add a splash of milk
- Skipping the salt , a pinch of salt balances the sweetness and makes every flavor pop
- Making them too big , oversized protein balls are harder to eat and take longer to chill. Stick to 1-inch portions
Storing and Meal Prepping Your Protein Balls
Protein balls are basically built for meal prep. Here’s how to store them smartly:
- Fridge: Up to 7 days in an airtight container
- Freezer: Up to 3 months , freeze on a tray first, then transfer to a bag so they don’t clump together
- Room temperature: Fine for a few hours if you’re packing them for travel, but don’t leave them out longer than that
I usually make a double batch on Sunday afternoons. It takes maybe 20 minutes of active time, and I have snacks covered for the whole week. Efficiency level: maximum :/
Final Thoughts
Protein balls are one of those rare recipes where the effort-to-reward ratio is just ridiculously good. You spend 20 minutes, you get a week’s worth of satisfying snacks. They’re nutritious, customizable, and genuinely enjoyable to eat , not in a “I’m forcing myself to be healthy” kind of way, but in a “can I have another one?” kind of way.
Start with the classic recipe, nail the technique, then start experimenting with flavors. That’s the real joy of making protein balls , the recipe is just the beginning. Now go make a batch and thank yourself later.
12
servings15
minutes30
minutes150
kcalIngredients
1 cup rolled oats
1/2 cup nut butter (peanut, almond, or cashew)
1/3 cup honey or maple syrup
1 scoop protein powder (vanilla or chocolate)
1/4 cup Greek yogurt
1 tbsp hemp seeds or chia seeds
Optional: chocolate chips, dried fruit, or coconut flakes
Directions
- In a large mixing bowl, combine the rolled oats, protein powder, and seeds.
- Add the nut butter, honey or maple syrup, and Greek yogurt to the dry ingredients.
- Mix thoroughly until a thick, consistent dough forms.
- If the mixture is too dry, add a tiny bit more yogurt; if too wet, add more oats.
- Roll the mixture into small, bite-sized balls using your hands.
- Place the balls on a tray and refrigerate for at least 30 minutes to set before serving.
Notes
- Store in an airtight container in the refrigerator for up to a week. You can customize the flavor by adding cocoa powder or cinnamon.